Save/Share: Share or Save your SVG files
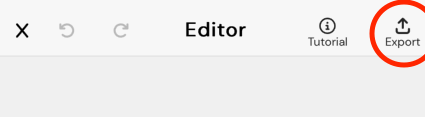
Click the export button
To export an SVG in Notion, simply click the export button on the top right corner of the screen (it looks like an arrow pointing up and to the right).
Exporting as SVG (Default)
To export the image as an SVG, click on the blue "save" button located at the bottom of the screen.
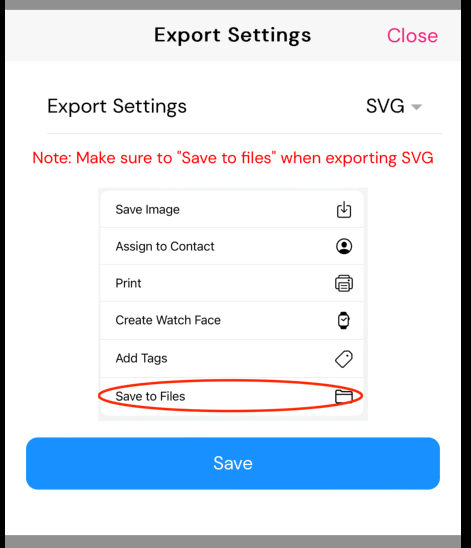
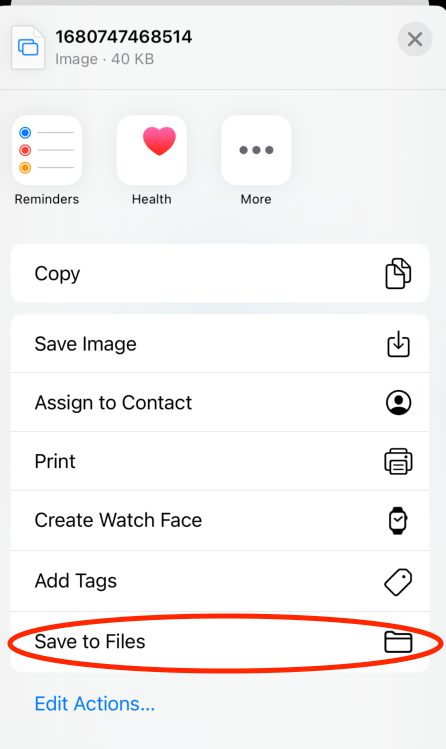
To display more options, swipe up on the menu. Then, click on 'Save to Files', as indicated by the figure on the left.
Important: Do not click on 'Save Image' as this will convert the image back to a PNG and save it to your photos.
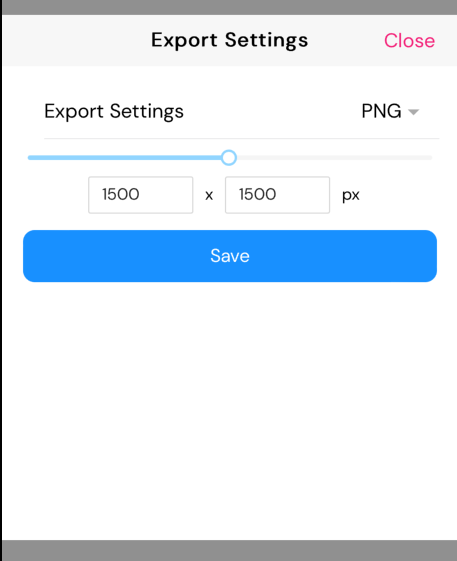
Exporting as PNG
To change the image format from SVG to PNG, click the dropdown selector on the right. This will bring up a slider with two input boxes, as shown below.
You can keep the default settings for your PNG size, or resize it to your desired size. The aspect ratio of the image will be maintained automatically, no matter how you adjust the input boxes, so you don't have to worry about that.
After adjusting the settings, click the save button. You can then take any action you wish with the image, since all actions on the share menu work with PNG files.
Sharing Your SVG with a Share Link
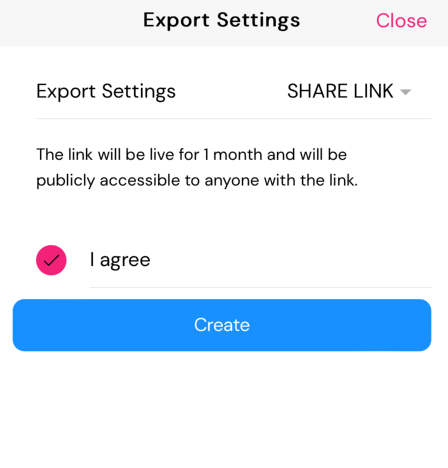
Share links is the best way to share SVG files across the web. You may have noticed that it can be difficult to send SVG files to friends or post them on social networks due to file type restrictions. If you want to share an SVG file with people on the web, using a share link is the best approach.
Just click on share link from the dropdown then click on create to give it a try.