Editor: Edit your SVGs easily.
SVG Editor
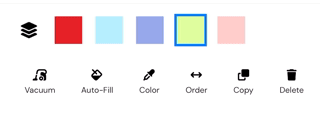
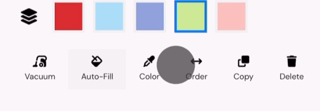
The SvgTrace Editor is a powerful tool for editing SVG images, and it has a variety of useful tools that can help you achieve the desired effect. One of the most important features of the editor is its layering system, which keeps the SVG file organized and compatible with all software. In addition, the editor includes a variety of editing tools, such as pan, fill-cut, erase, vacuum, auto-fill, color, order, copy, and delete, that can help you edit your SVG images with ease.
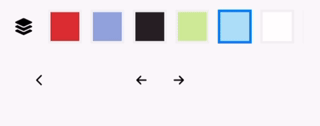
Layering System
The layering system in SvgTrace Editor is organized by color, allowing you to easily group elements with similar colors together. This feature makes it easier to manage and apply edits to specific parts of your image. Additionally, you can adjust the order of the layers to ensure that each element is properly aligned and visible.
Tools
Pan
You can move your image around the canvas and adjust the zoom level to your liking. This is especially useful when working with larger images or when you need to focus on a specific area. To pan the image, click and drag it around the canvas.To zoom in and out, use pinch gestures. This feature makes it easy to manipulate your images and achieve the desired effect.

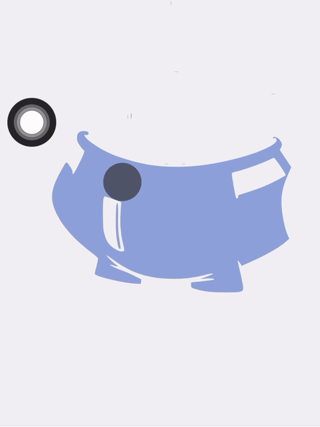
Fill-Cut
To fill or remove parts of an image, simply tap on the desired area. Tapping on an empty area will fill it with color, while tapping on an existing area will remove it. This tool can be used for both removing unwanted paths and filling in gaps, making it a versatile 2-in-1 tool.
Erase
The Erase tool can be used to erase specific parts of an image using a brush size of your choice. This is especially useful when you need to remove small or intricate details. To use this tool, simply select the Erase option and choose the desired brush size. Then, click and drag the brush over the area you want to erase.

Vacuum
This tool is specifically created for precise editing tasks where you want to remove small details that are near a larger object without affecting the larger object. It achieves this by erasing all objects that are smaller than the size of the brush that you are using. This means that you can remove unwanted details and blemishes with ease, as if you are using a vacuum cleaner to sweep away any imperfections.
Auto-Fill
The Auto-Fill tool is a quick and easy way to fill all of the areas inside the biggest enclosed path. This is especially useful when working with complex images that have many small gaps or spaces that need to be filled. Simply select the Auto-Fill tool and click on the biggest enclosed path to fill it. This can quickly help you create a solid base layer to put all of your other layers on top of.

Color
To change the color of a layer, click on the coloring tool and use the "set color" window to select the desired color. Then, press "save". The "set color" window includes a color picker and a palette that contains all existing colors in the image.
Order
To change the order of your layers, click on the Order button and then use the left and right arrows. Note that the layers are ordered from bottom to top.
Copy
To make a copy of a layer, press the copy button.
Delete
Just click the delete button to remove a layer from the image.