Convert a JPG to an SVG file
Looking to convert a JPG, PNG, or other image files into an SVG so that you can upload your own images into Cricut Design Space? You can use an Image to SVG tool .
Finding Images to Convert
First, find an image you want to convert to an SVG and download it. The image can be any of the typical file types that you can find online. JPG, PNG, or other common file types.
Or you can use an image that you created yourself. Images that work best in the tool are also the kind that works best for the Cricut. Designs with bold, distinct sections of color, work great because of how the Cricut cuts layers.
Image to SVG Tool
Once you have an image, upload it to the tool using the drag and drop menu. You can click the menu and then select the file on your computer through the file explorer. Or you can grab the file from where you saved it and drop it in the window.
Selecting Colors
This tool requires you to select the colors you want to see in the final SVG file. The colors you select are the only ones that will be in the final SVG. If there's a color in the image that you don't select, the tool will find the nearest selected color to change it to in the final SVG.
To select colors all you have to do is hover your mouse over a part of the image and click. Use the color preview on the right to check your color selection.
Selecting colors allows you to control how many layers the final image will have and can simplify a complex image into a Cricut-ready masterpiece.
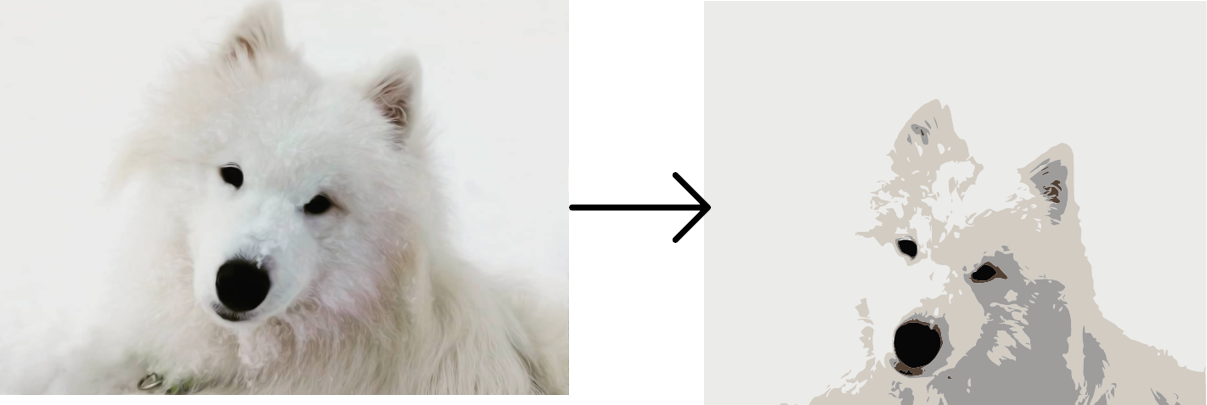
Convert to SVG
Once you've selected your colors, click the convert button in the lower right. It may take a minute for the image to convert, but once it does you will be able to check the final SVG in the preview window.
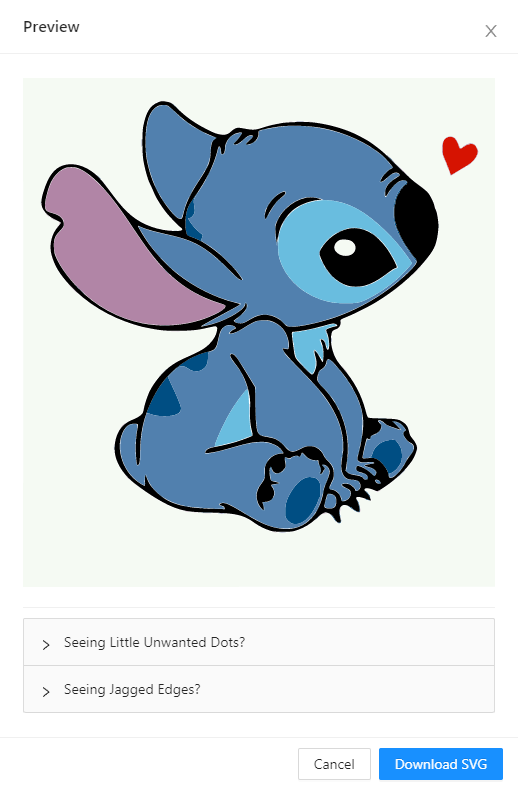
Take a moment to check that the SVG looks exactly how you want. If everything looks good click 'Download SVG' and your SVG will be downloaded into your default downloads folder.
If there are any colors you missed just click cancel to return to the tool to add them in. If the edges don’t seem quite right or there are little segments of color you don’t like, jump to the next section where we’ll talk about adjustments.
Final SVG Adjustments
The tool has three advanced options to tweak and perfect your SVG.
The dot remover slider allows you to remove small unwanted blobs of color on the final image. The higher the slider goes the larger the blobs removed will be.
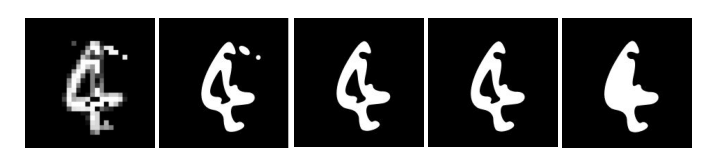
If the slider is set too high, details that are desired in the image might be removed, so it’s best not to increase the slider to the max right away.
The 'Smoothness' and 'Simplify Curves' sliders allow you to smooth out jagged curves and edges in your SVG. This is common if the original image was low resolution but can happen for several reasons.
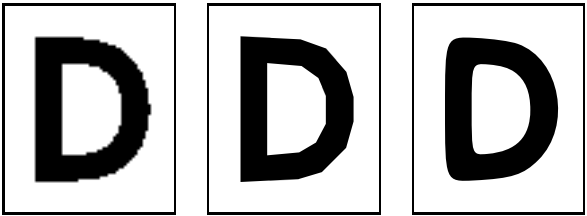
Increasing either of the sliders should have a similar effect but sometimes one works better than the other so try one and see if you like the result. If not the other should give the look you want.